
Day 54 5.6.2020

Today my class helped me learn more about creating patterns using two apps: ProCreate and Affinity Designer. The class is by Jennifer Nichols on Skillshare [click here and try a free trial]
This post is to remind me of some tips to get started once my design in ProCreate has been created. I created these flowers using radial symmetry:

Now the trick is not touch the edges. Then export the png and import into Affinity Designer [AD] for some magic with math on a grid.
First, be sure to note the size of the png — mine was 3600 pixels by 3600 pixels.
Start a canvas in AD and be sure to choose PIXELS and set the canvas at the same size 3600 pixels by 3600 pixels at 300 DPI with a transparent background. The words are small on the device and default seems to be “points.” So be sure to choose “PIXELS.”
![]()

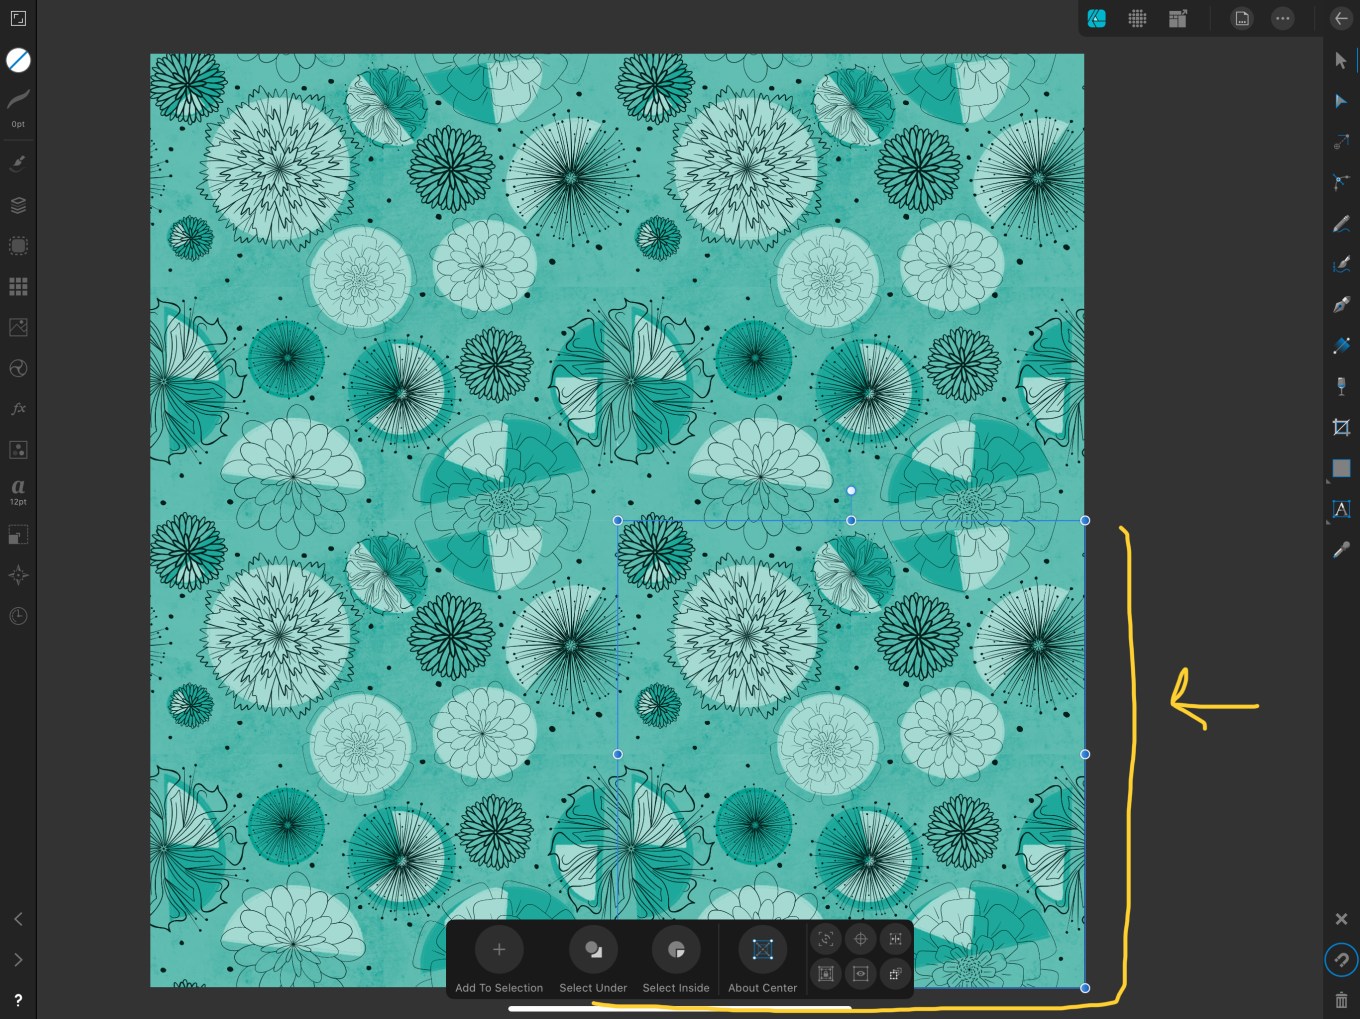
In AD, menus run across the top and down the sides — yours may be opposite mine because I’m left handed.
First, know your placements at corners and side midpoints for this 3600 square canvas:
[apologies for the quick mark-ups on my iPad, but they will do]

And, one other thing, if the background is white when opened, change to transparent background like this:

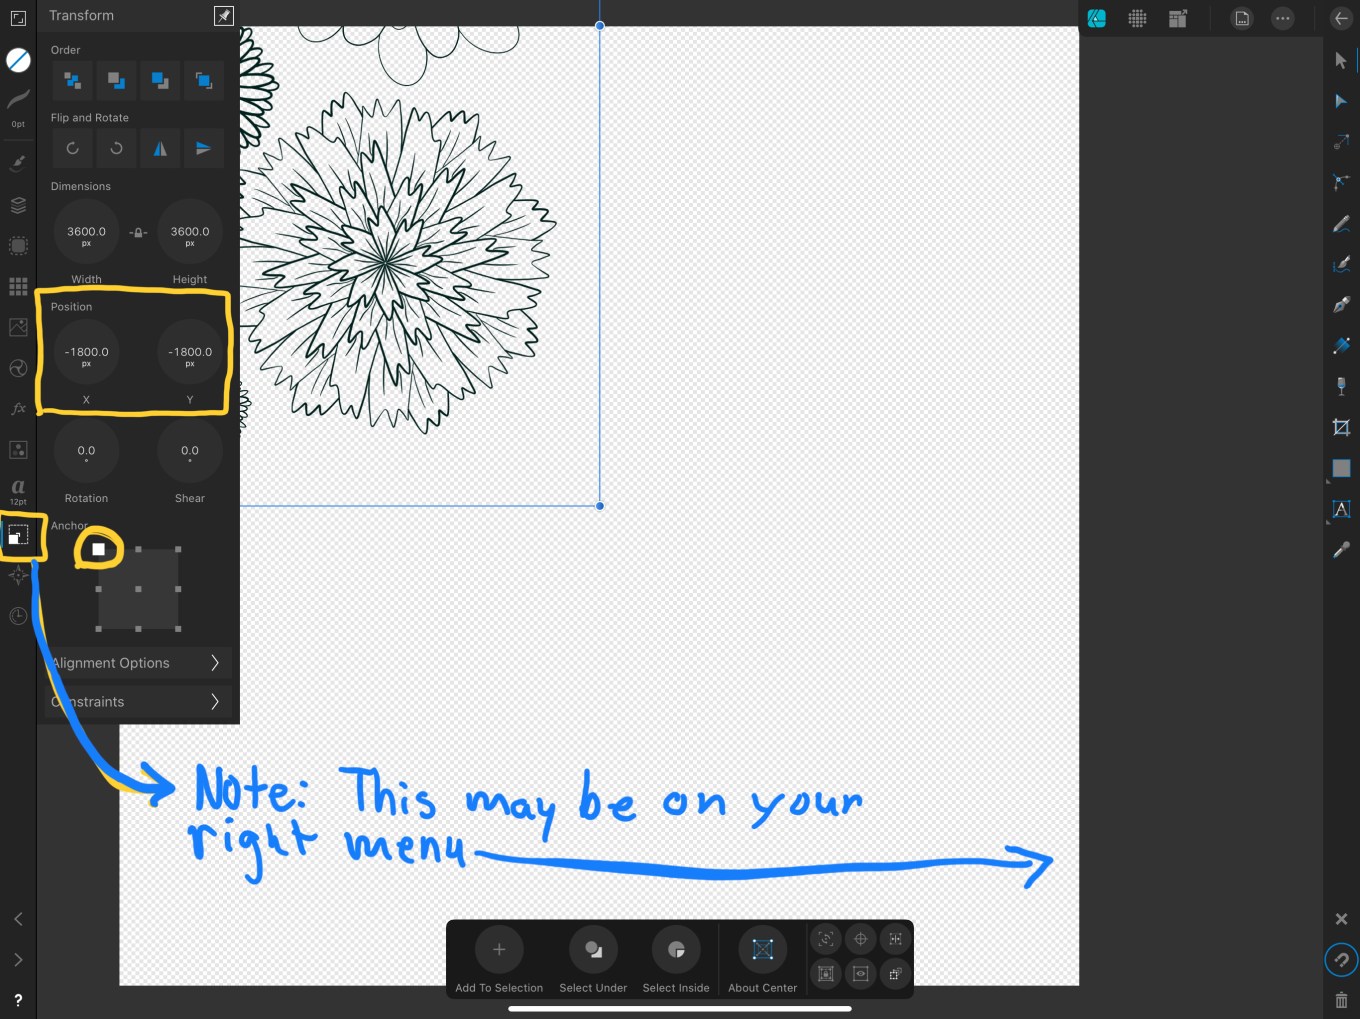
Now “place your image” across the canvas, then choose the “position” icon, the box with a filled corner square. Change the x,y positions to (-1800, -1800)
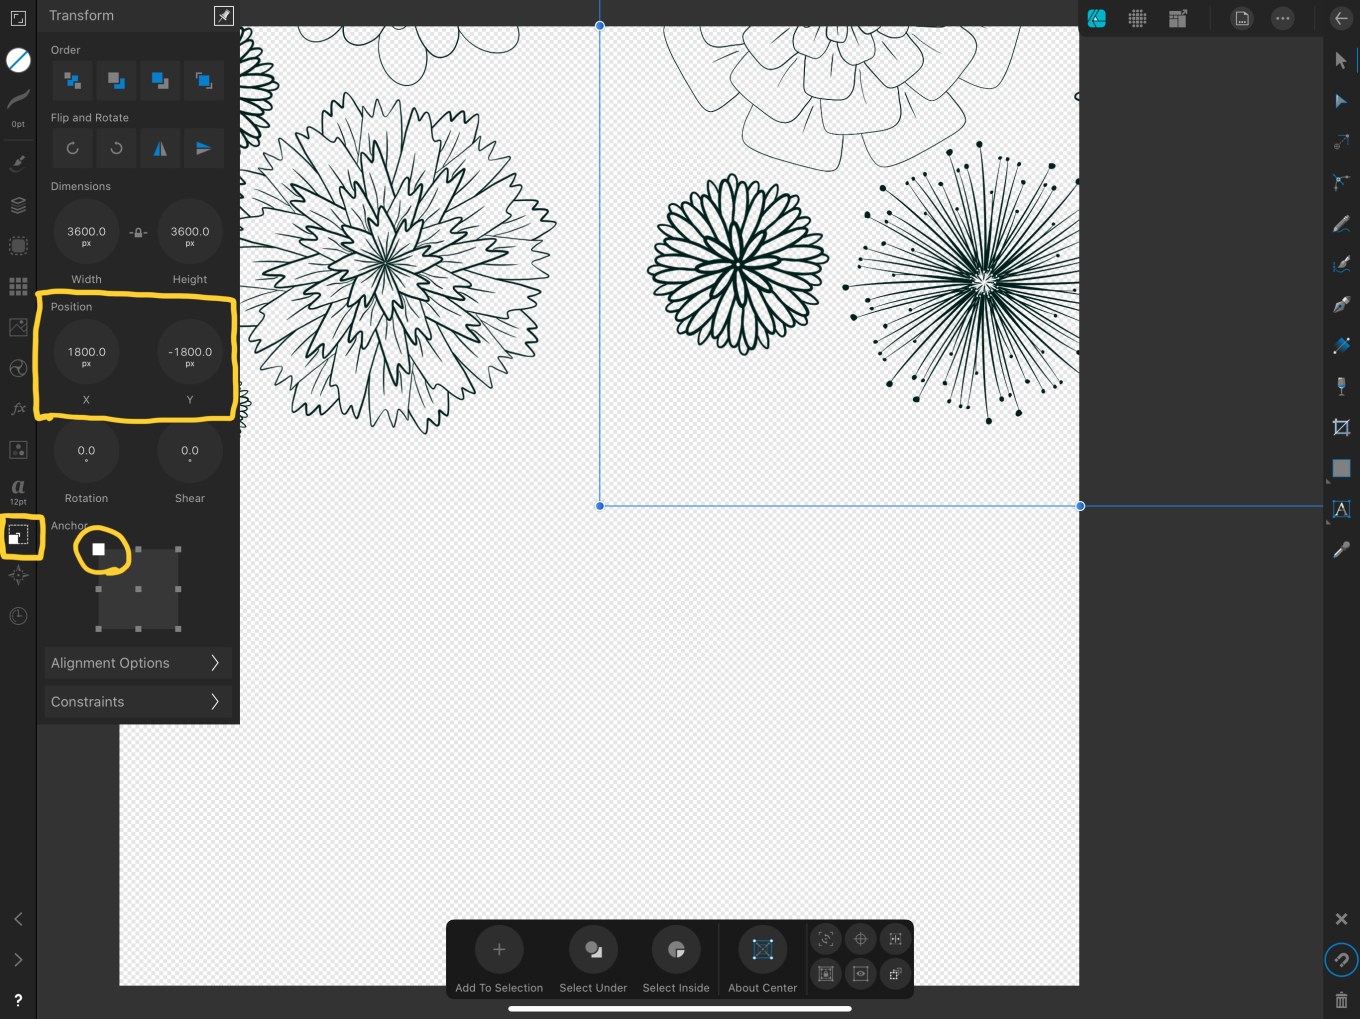
Now, you can either choose copy and paste with the usual commands, or just choose “duplicate” from the “document icon”. Command J is duplicate.
Set this one at (1800, -1800)
Duplicate. Set this one at (-1800, 1800)

Duplicate. Set at (1800,1800)
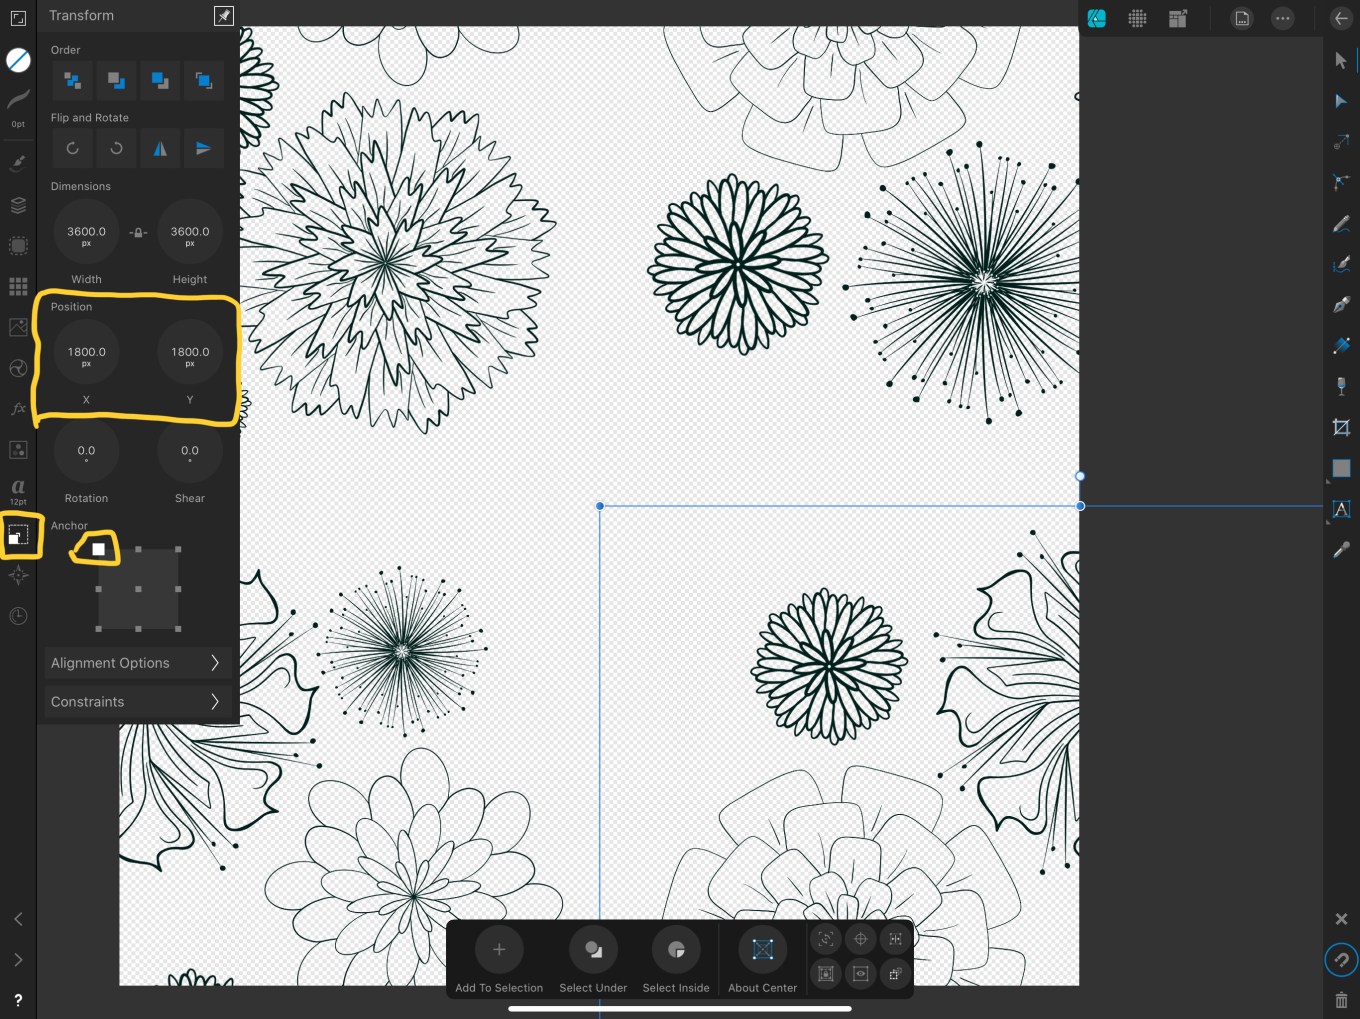
If you notice the edges, you will see the pattern is now created so if this is duplicated, the edges will match.
Export as png directly back to ProCreate to fill in the center with more flowers:
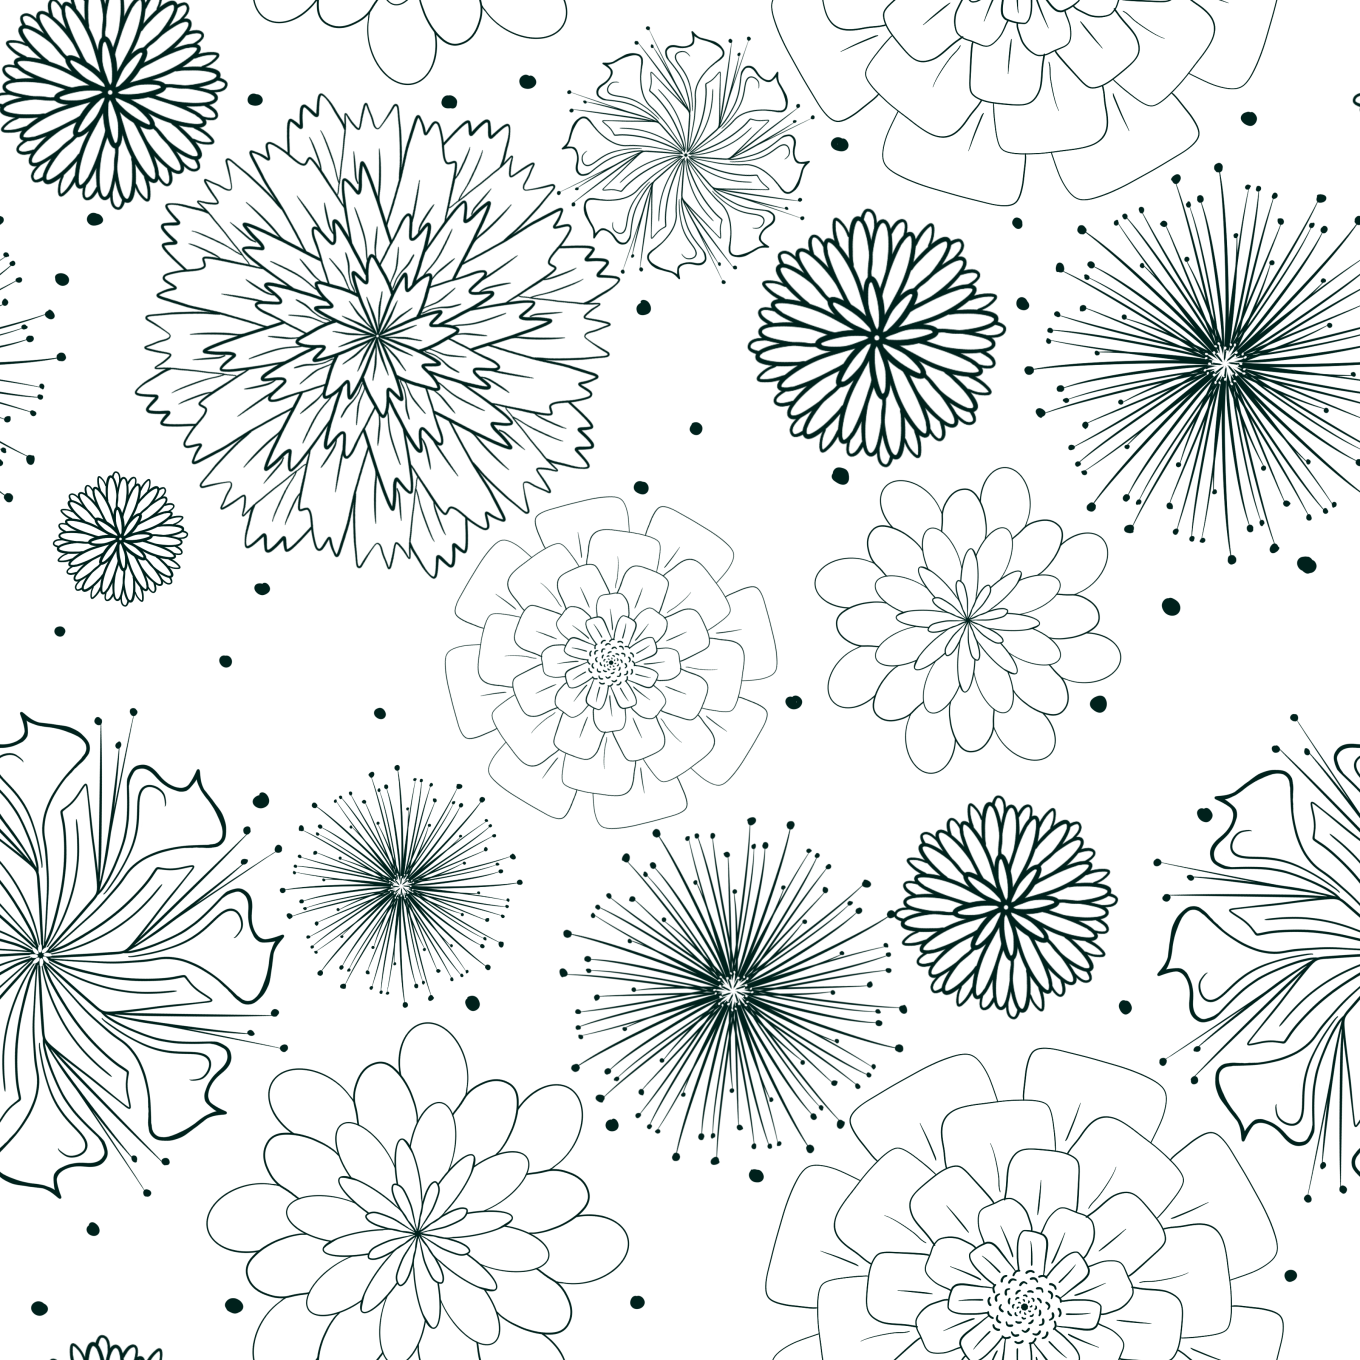
I added a few dots to the open spaces.
Now just add a background and color as desired. For a quick image, I simply drew in and filled shaped on a layer below the flower lay with the background below that.

I exported this png and imported it into AD again. This time I duplicated the image three times, then grabbed the corner of each to place a smaller version in each of the four canvas quadrants, so the pattern repeats. Affinity Designer does a great job of easily snapping each into place.
Now the pattern is ready for upload to your favorite artists place like Red Bubble or Society Six.
Thanks, Jennifer, for another wonderful class.
Categories
art, Art Techniques, CLMOOC, Connect2Learn, Projects, Technology
Sheri Edwards View All
Geeky Gramma ~~
Retired Middle School Language Arts/Media Teacher ~~
Writer and Thinker~~
Art from the Heart
